This is the second in a series of posts explaining the general workflow I follow when using PixInsight. We’re going to take a quick look at improving our bias frames still further, using PixInsight’s SuperBias module.
Read on for more on about creating a good super bias. (If you’ve arrived part way through, start the series here with Bias Frames).
Improving Bias Frames
As we saw in Part 1, we can measure (and eventually subtract) the fixed pattern created by a DSLR by integrating a large stack of bias frames (very short exposures with no light hitting the sensor). The more individual bias frames we add to the stack, the better the Signal to Noise Ratio (SNR) of the resulting master bias frame.
Whilst it doesn’t take long to capture a few hundred bias frames, there is a practical limit to how many PixInsight can stack, depending on the amount of memory your computer has. Additionally, the more frames you use, the longer and longer the ImageIntegration process will take to complete. Given the marginal improvements of adding new frames, I suggested that there was no point in continuing beyond about 160-180 bias frames. But what if there was a method to get the benefit of stacking thousands of frames without the time and effort?
Superbias to the Rescue
PixInsight has a SuperBias module that allows us to do exactly that, with one proviso: It will only work for a master bias frame that has a dominant pattern of vertical and/or horizontal stripes. If your camera produces a master bias with some other pattern, such as diagonal bands, stripes or something else, SuperBias probably won’t be of benefit.
As you can see, my Canon 500D’s master bias of 330 frames shows a dominant pattern of thin vertical stripes, with a secondary pattern of fainter large-scale horizontal bands:
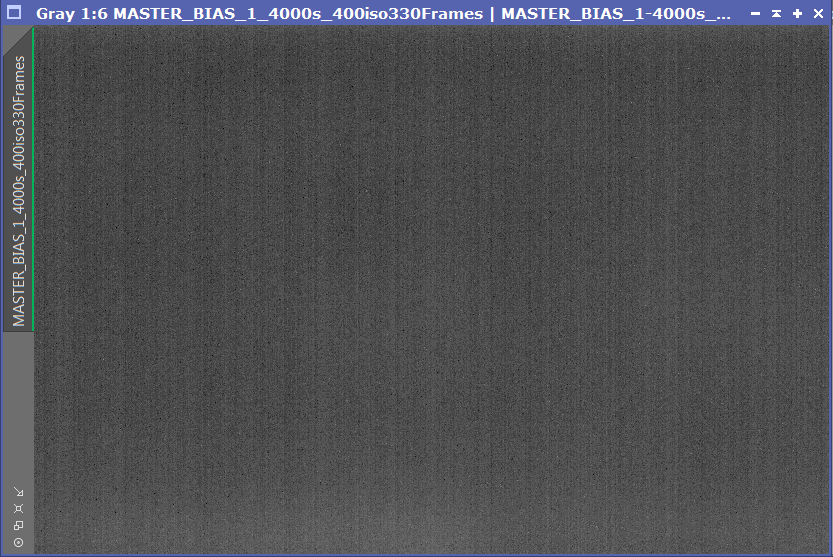
Notice that I’ve applied the PixInsight Screen Transfer Function (STF) to the master bias so that we can see what is going on; by default a bias frame would look black on screen due to the very low ADU values it contains.
With my master bias, I found that applying the default settings of the SuperBias module to it gave the best results, as shown below:

Simply apply the module to your best master bias frame and evaluate the results visually after applying the same STF to both the master bias and the super bias.
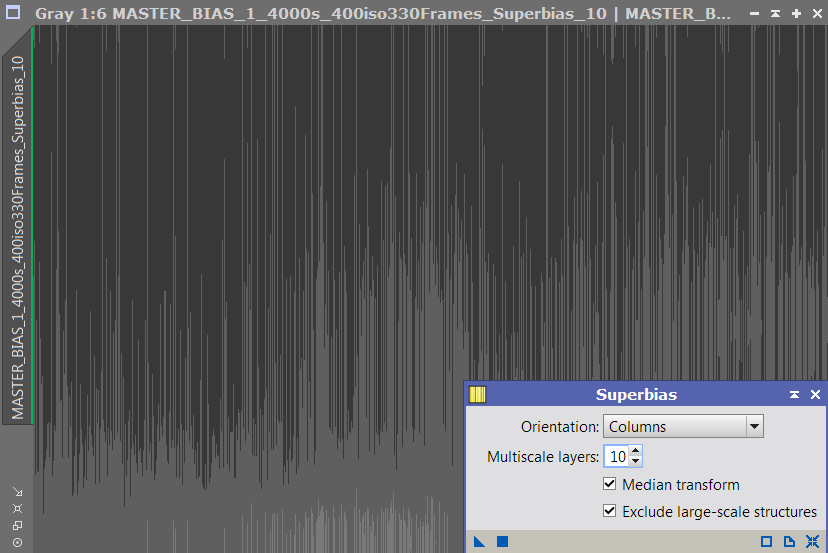
In my case, this is what I got from the default process settings:

You can see that we now have a much clearer pattern of vertical stripes, and that the large scale horizontal bands also feature. The super bias has absolutely no random noise. Superbias simulates the result of stacking thousands of individual bias frames.
Superbias Settings
There aren’t many settings to play with in this module. The ‘Orientation’ setting should be changed if your master bias has a dominant horizontal or checkerboard pattern of stripes instead of a vertical one.
The ‘Multiscale layers’ setting can be increased or decreased to preserve the large scale patterns in the master bias. As you can see below, increasing the number of layers to 10 reduces the effect of the large scale horizontal band pattern, especially along the top edge of the image, so I left it at the default 7 layers:
I suggest you experiment with different values for the layers and/or orientation settings whilst comparing the results visually to see which gives the best match for the original master bias.
The Final Test
The final test of your super bias master is to subtract it from the original master bias frame, whilst remembering to add a Pedestal.
Note: A pedestal is a small extra ADU value that you add to every pixel before subtracting one image from another. Due to the random nature of noise in images, subtraction operations can easily result in pixels with negative values. Since negative values aren’t (usually) allowed in images, PixInsight will ‘clip’ them to zero. Thus careless application of bias and dark frames during image calibration can create unsightly black ‘holes’ all over your image.
To perform the subtraction, we use the PixelMath process with the settings as shown below:

In the “RGB/K” box, enter the following expression:
(MASTER_BIAS + 0.01) - SUPER_BIAS
- Substitute the actual image name of the master bias where it says “MASTER_BIAS”, and the super bias where it says “SUPER_BIAS”. So in my case I have put the following:
(MASTER_BIAS_1_4000s_400iso330Frames + 0.01)- MASTER_BIAS_1_4000s_400iso330Frames_Superbias_7
- You can use the “Expression Editor” button to get more help constructing expressions. For example, the names of all open images are available to double click and insert in to the expression.
- Under the “Destination” section I have selected “Create new image”; the default is to overwrite the target image but I want to keep my original master bias for comparison purposes. Leave all the other settings at the defaults.
- Finally click the blue square “Apply” button to execute the expression and a new image window should appear with the result of the subtraction.
This pixel math expression takes each pixel value in the master bias image, adds a pedestal of 0.01 to the value of that pixel (to avoid creating any values less than zero as discussed), then subtracts the value of the corresponding pixel value from the super bias image and finally writes the result to the corresponding pixel in a new image.
Note: We put the pixel math expression in the “RGB/K” input box because this is a single channel greyscale image (“K”) which we haven’t yet debayered it in to a colour image.
The resulting image looks like this:

As you can see, it is composed of random noise with no visible patterns or other artefacts. This demonstrates that the super bias is a good one as it has successfully subtracted the fixed pattern from the master bias and left only the random noise behind. Thus the super bias will also be effective at removing the fixed pattern from dark, flat and light frames during calibration, but with the advantage of not adding its own contribution of noise to the calibrated images.
If the result of the subtraction process had produced any visible stripes, bands or other artefacts, that would indicate that the Superbias process was not effective; you should try different settings. If you can’t find satisfactory Superbias settings for your camera, leave it out of your workflow and use the standard master bias instead.
Note: You can check whether the pedestal was sufficient using the PixInsight Statistics process. Examine the “minimum” pixel value in the result image. If it is greater than zero then the pedestal has done its job. If the “minimum” pixel value is zero, then it is likely that some clipping of negative values has occurred so try again with a larger pedestal value.
That’s it for the Superbias process. In the next instalment, we’ll be shedding some light on dark frames.
Exelent!!!!!!!!
nice work