It’s been a long haul, but we’re almost there. In this final part, there are just a few minor steps to complete the observatory.

Roof Latches
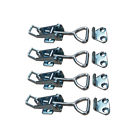
In order to keep the roof closed I obtained four large “Over Centre Fasteners” which are often sold online as accessories for horseboxes and trailers. The catches were screwed to the inside of the moving roof chassis and the fasteners to the walls. The reach of the fasteners can be adjusted by screwing the metal hooks in or out of the body to suit. Don’t over-tighten or this will warp the roof chassis out of shape over time, but equally you need to ensure they are tight enough to prevent the roof sliding when engaged.
It is essential that the fasteners are strong enough to hold the roof down in high winds. Even the heaviest roof can be lifted off by a strong gust so don’t skimp on this point. If you intend to operate with the roof open during high winds you will also have to give some thought to keeping it captive in the open position – it could be as simple as more fasteners attached to the roof rails, or some kind of sliding U-hooks around the rails if you worry about it blowing off when opening and closing. Personally I do not intend to open the roof if the weather is unsuitable.
Sealing The Gaps
In order to prevent the build up of condensation due to our constantly changing weather, I did not try too hard to completely seal the gap around the roof. I just wanted to prevent the entry of rain and wind being blown sideways, but still allow ventilation so the air can circulate. To do this I cut strips of the flexible damp-proof course and stapled them around the top edges of the walls. This forms a flexible and reasonably effective seal to keep the weather out.
It doesn’t prevent spiders getting in, so a few cobwebs can build up if there are long gaps of bad weather preventing me from using the observatory. If you do want a better seal, look for flexible nylon brush-style draft-excluders. These can be fixed around the roof to provide an insect-proof barrier, but they are relatively expensive to buy.
I also fitted right-angled wooden edging at the ourside corners of the wall and roof cladding. It is difficult to get (and keep) a perfect fit between the edges of the shiplap. The wooden edging protects the end-grain and stops moisture from getting directly in to the wall cavity, prolonging the life of the cladding.
Painting The Interior
I painted the OSB interior walls using two coats of matt black acrylic paint. This cuts down on stray light reflections, as well as protecting the exposed surfaces of the OSB when the roof is open.
Electrical Supply
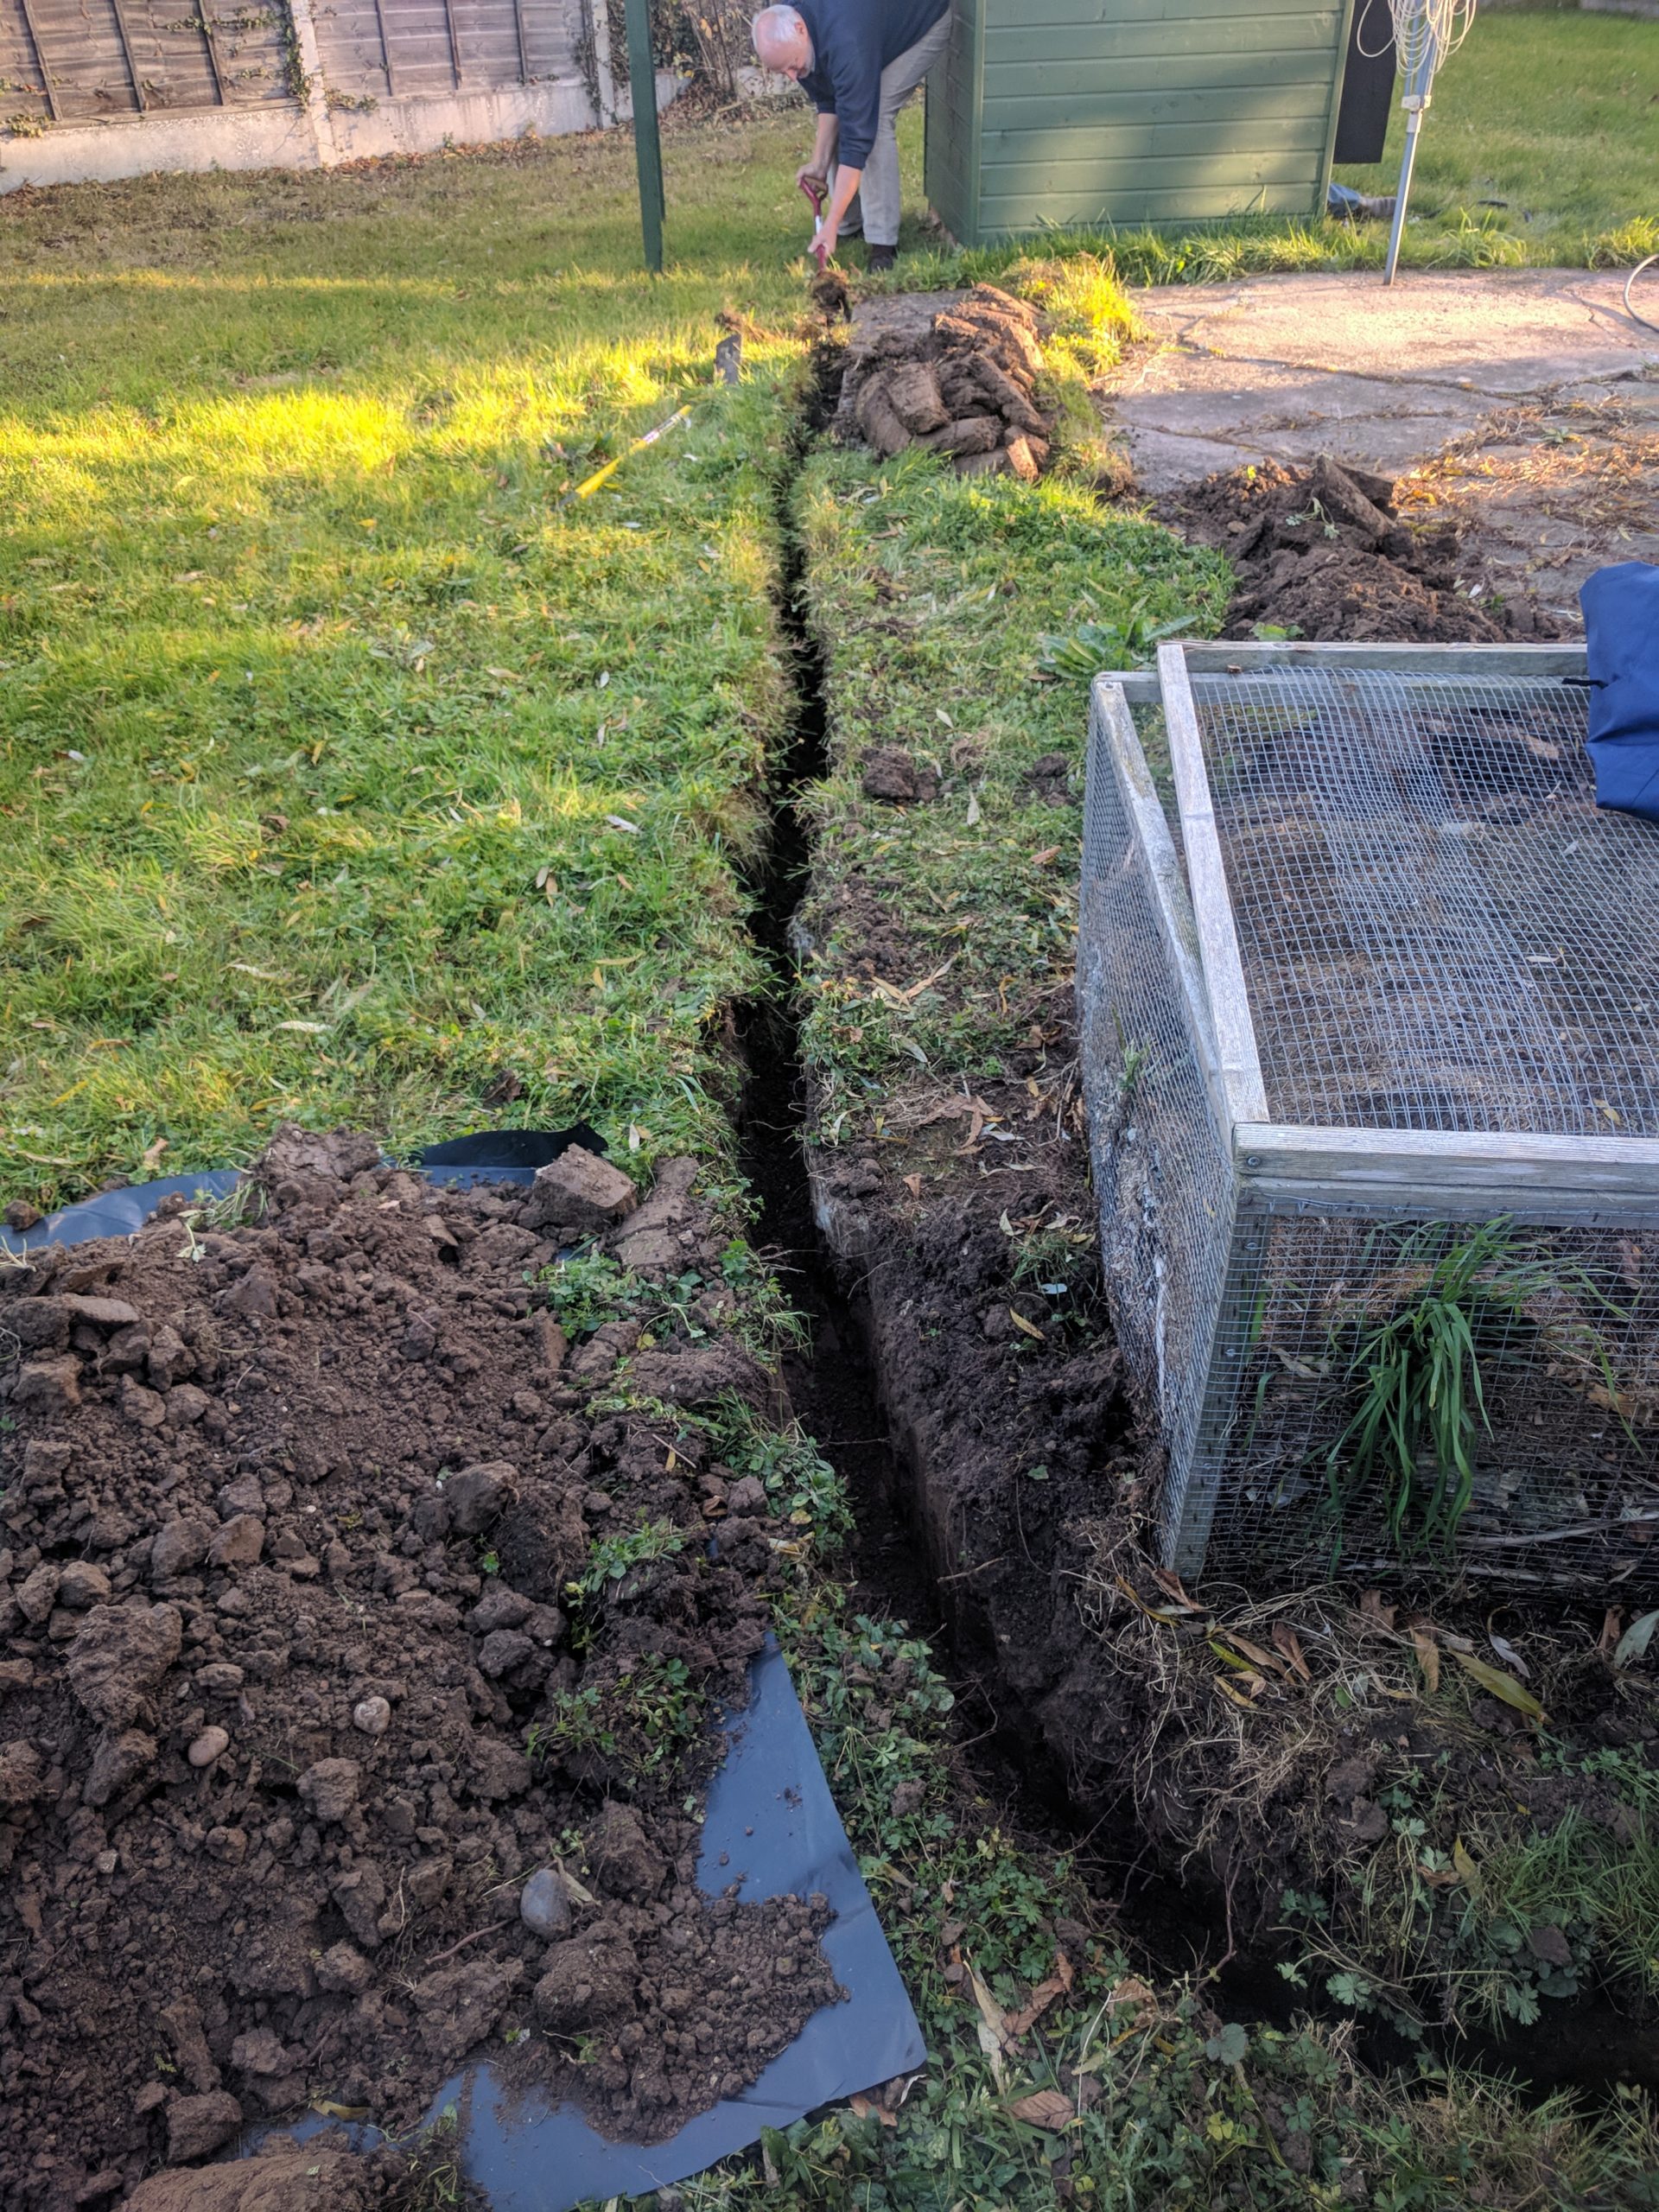
I had an electrician run a spur from the house to the observatory using steel wire armoured cable (SWA). This was buried in a trench and entered the observatory at the duct that I had previously fitted for the job. The cable was terminated using a two-way switched socket. All mains voltage power supplies are housed in a large Dri-Box to protect them against dew formation when using the observatory. All of the equipment is run from here using low voltage DC (typically 12V) for safety.
A mini-PC to run the mount and cameras is housed with the power supplies and controlled remotely over WiFi from a laptop inside the house, eliminating the need for any further cabling. If your observatory is out of reach of the WiFi signal, a good alternative is a pair of PowerLine adaptors which carry the network data over the mains cable.
Final Thoughts
The last step is to landscape around the observatory using whatever materials you prefer. I used gravel and some old paving stones to keep weeds and grass from growing up the walls.
This project took longer than I thought it would. The build took several months of effort working perhaps two whole days per week on average. Now I know what I’m actually doing, I could probably complete the same build in about half that time as there would be less trial and error and looking for solutions to each problem. The electrical supply took several months wait to get installed, but that wasn’t a job I was prepared to tackle myself. I could have dug the trench and installed the cable, just using the electrician to terminate it, but by this point I’d had enough of digging heavy clay soil!
Having my imaging equipment set up and ready to go at a moment’s notice is a game changer, as it means I can make use of much smaller gaps in our ever-cloudy weather. I no longer have to spend the best part of an hour and a half setting up, aligning and breaking down at the end of the night. I hope these posts will inspire you to do something similar if you are an imager. Not every observatory has to be able to accommodate a party of five and have a warm room, especially if you have a house nearby that can do the job just as well.
This is exactly what I need to do. I have a Celestron 8SE, mini computer to operate the scope and my Nikon D7100. I still have to check to see if my mini will do the job. I know my laptop will do it so if the mini won’t suffice, then I’ll just use buried PVC to house the electrics and USB cables to the house. A run of about 20 meters.
Thanks for your great post on building your Observatory. Hopefully mine will go as smoothly as yours went. You have made it look very DIY-able.
Ian I couldn’t find another way of contacting you so sorry if its off topic! I am currently writing a book on astrophotography and would like to mention and include a screenshot of your imaging toolbox as its the best one i’ve found if thats ok I will credit you of course.
Mike O’Brien